Use-Case
Flexibility and compartmentalizing risk is key to much of my thought process, especially while bumping around and learning a new operating system, building new tools or scripts or even playing around with TryHackMe and HackTheBox. There are many methods for compartmentalizing your activities, but for rapid switching back and forth as well as cost, none offer the flexibility of visualization.
Unlike dual or USB-booting systems, virtual machines allow you to switch between operating systems almost instantly, and even share clipboards between host and guest. If you are reading this article from the perspective of setting up your first virtual machine, then you are likely doing so to try a Linux distribution from the safety of Windows 11, or even MacOS.
In this post, I’ll provide a quick down and dirty, step-by-step guide to building, customizing and running a Kali Linux virtual machine as it is similar but slightly more complex than Ubuntu. We’ll go over first steps post-installation, then finish up by taking a ‘snap shot’ of your newly updated system.
This tutorial should take no more than 20 minutes, depending on your system resources and internet speed.
Installation
There are many hypervisors out there and I’m sure that they excel in different ways. However, this tutorial will utilize Oracle’s VirtualBox. I’ve used it every day for many years now, and how found it to be a stable, dependable and simple platform to use.
Installing VirtualBox
From Windows, you can visit https://www.virtualbox.org/wiki/Downloads and click on “Windows hosts” under VirtualBox 7.#.# platform packages, then install the downloaded file the way you would with any other software package.
From Ubuntu-based Linux distributions (I use Pop!_OS), make sure that you’ve installed the latest and upgrades, then you can open a terminal and type the following:
sudo apt install virtualbox -yDownload your Distribution
As mentioned before, this tutorial will be covering how to install Kali Linux, which you can find on https://www.kali.org/get-kali/#kali-installer-images. I typically go with the recommended version but which ever you decide, make sure that you take special note of the system requirements. For Kali, we will require at least 2 GB of ram and 20 GB of disk space.
The team at Kali also offers pre-built virtual machines with special featurs, and I believe that they still recommend these for Offensive Security’s Pen-200 course. If you’re simply looking for a pre-configured version of Kali that works out of the box, then check out https://www.kali.org/get-kali/#kali-virtual-machines . However, if you’re interested in developing a skill that enables you to create a repeatable process for other operating systems in the future, the read on.
Setting up your Virtual Machine
Now that VirtualBox has been installed, launch the VirtualBox application and click the “New” button at the top of the manager. Then type the name you would like to title this machine, change Type to Linux and next to Version, select Debian (64-bit), as seen in the below screen shot:
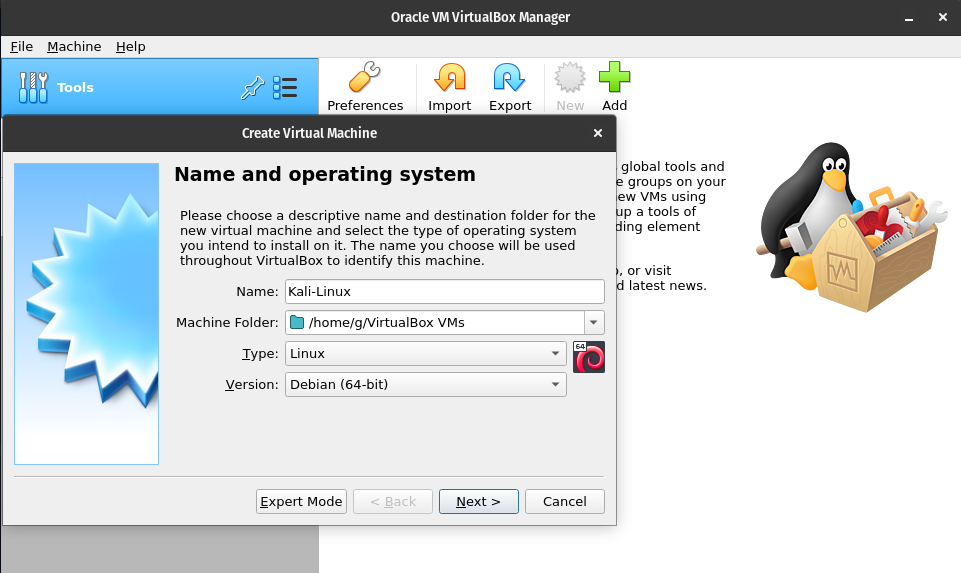
When complete, click the Next button.
Memory Size
Here you will select the amount of your systems memory (RAM) that you would like to allow the virtual machine to use. Remember that this will effect the performance of both your host machine as well as virtual (or Guest) machines, and that Kali will require at least 2 GB of RAM.
In my case, I will be mostly focused on the VM’s screen while it is active, so I will allocate at least 16 GB of RAM by typing 16000 into the white space, then click Next.
Hard disk
- For most user requirements, you will ensure that “Create a virtual hard disk now” is selected, then click Create at the bottom of your screen.
- Hard Disk Type: VDI (VirtualBox Disk Image), click next
- Storage on physical hard disk: Dynamically allocated, click next
- File location and size: I leave the file path as is and type 30.00 GB (20.00 GB required) in the white space to the right of the slider. Click Create.
Your machine has been created and should now appear on the left-hand side of the VirtualBox Manager!
Virtual Machine Settings
This next series of steps will configure your settings to enable successful deployment of your machine. To follow along, highlight the machine on the left-hand side of the VirtualBox Manager menu, then click the orange gear across the top, titled “Settings”.
- General Settings > Advanced: I allow Shared Clipboard from Host to Guest, but keep Drag’n’Drop disabled.
- System > Processor: Ensure at least two Processor(s) are enabled.
- Storage > Controller: IDE: Click on the disk image below titled “Empty”, then click the disk icon next to IDE Secondary Dev, as shown in the below image. If your ISO image does not appear here, then click “Choose a disk file…” and located the image within your downloads folder.
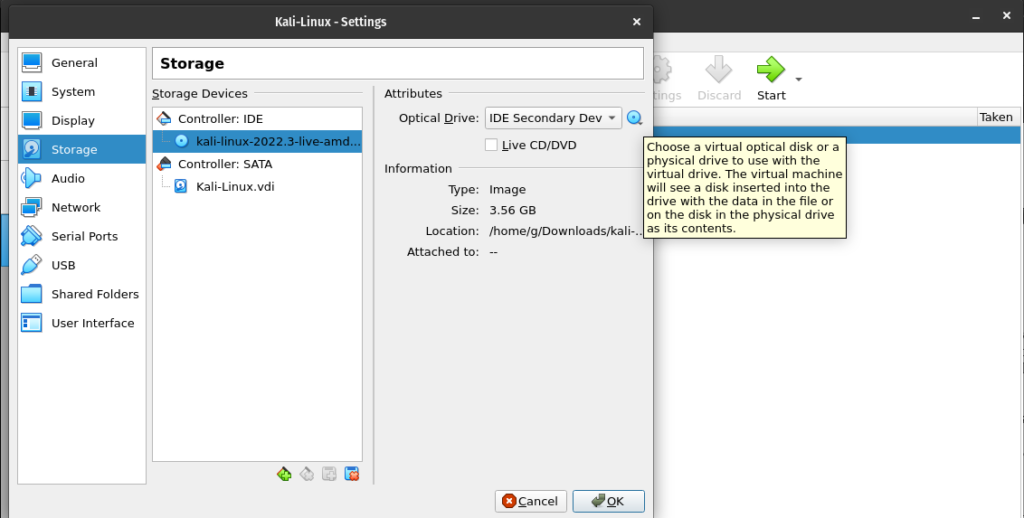
Click Ok to save the changes made, and you’re now ready to install the image.
Installing Kali
With the above settings saved, its time to fire up the virtual machine with the disk image. You should already be back to the VirtualBox Manager menu, so ensure that your machine is selected on the left-hand side, then select the green arrow across the top, titled “Start”.
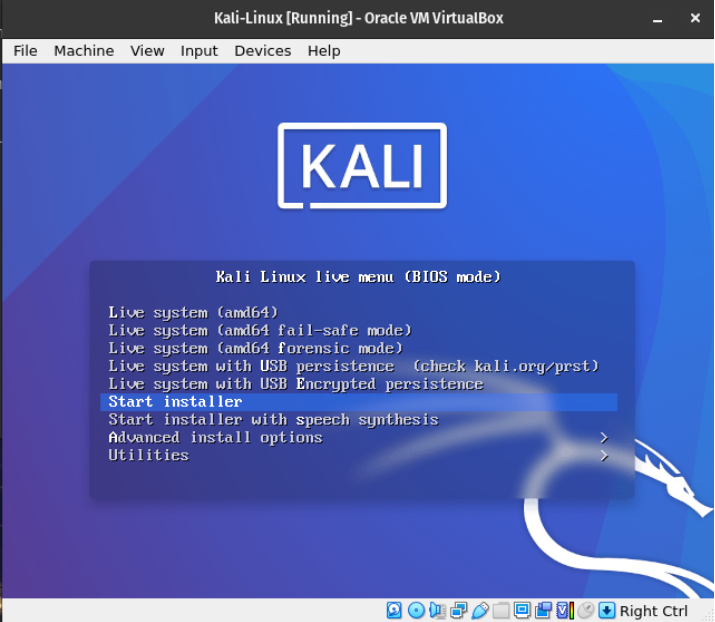
Once the machine has started, you’ll be brought to the above screen. Click in the window, allow the machine to capture clicks and keyboard, then use the arrow keys to navigate down to “Start Installer”.
- For these next few steps are pretty obvious and you can just click through with your language preference.
- For my host & domain names, I’ll simply type “kali”, then click continue.
- For my Username, I’ll type something then click continue.
- Select a password then click continue.
- After loading for a bit, you will have the option to configure your clock based on time zone, then click continue.
- Partition Disk: Guided – use entire disk. Don’t be nervous fat this step, as it only uses the entirety of the disk you allocated for the virtual machine! Click continue.
- Select your disk and click continue.
- Selected for partitioning: Ensure “All files in one partition (recommended for new uses)” is highlighted, then click continue.
- “Finish partitioning and write changes to disk” should be highlighted, then click continue.
- On the next menu, it will ask if you want to write changes to the disk. Click Yes, then click continue.
This next step will install the system to virtual disk you’ve created, and might take some time. Your patience will pay off soon!
Configure the Package Manager
- Continue without a network mirror: No, then click continue.
- Install the GRUB boot loader: Click yes, then continue.
- Device for boot loader installation: select your drive, then click continue.
Finish the Installation
You should have arrived at the following screen:
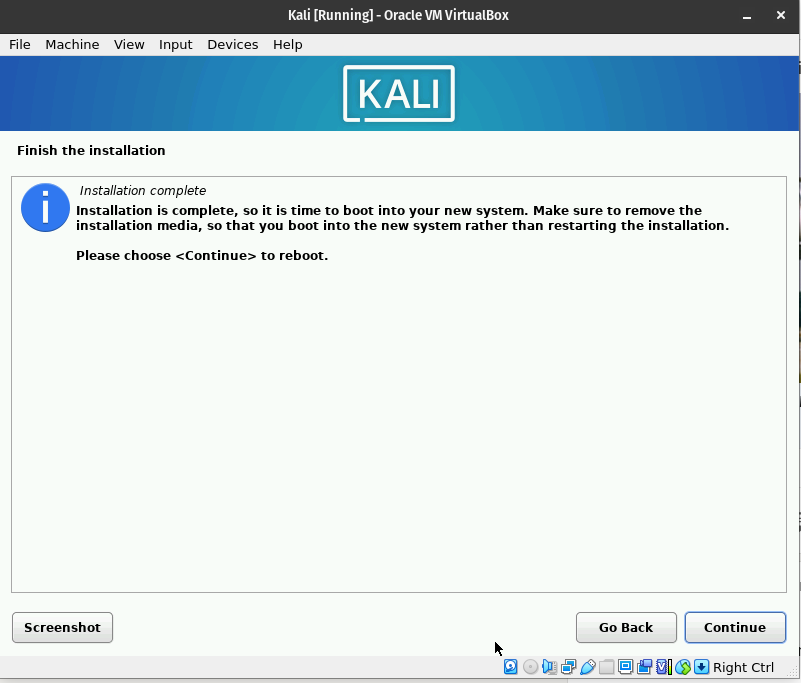
Click continue to reboot your Kali Linux virtual machine. This may take a few minutes.
Once you arrive at your desktop, open a terminal by clicking on the icon in the task bar across the top of the page, or hit Ctrl + Alt + T. Here, we will need to upgrade and update the system, which could take some time. You can complete this with the following:
sudo apt update
sudo apt upgrade -y
Running the above two commands could take 30 minutes or more for a newly downloaded image, but will take less time each day. As a standard practice, I boot up my Kali VM 20 – 30 minutes before planned use, to make sure that there is sufficient time for the updates and upgrades to run.
Building your Snap-Shot
Once your system has been updated and upgraded, go ahead and close the virtual machine window. Now back to the VirtualBox Manager menu, we’ll build a back up to the new machine that you just built and updated, to revert back to in the event that the worst happens. To do this, ensure your virtual machine is highlight on the left, then click tool bar icon next to the machine title. You’ll notice the icons across the top of the Virtual Box manager have now changed to something similar as below. Click the camera with a plus sign, titled “Take”.
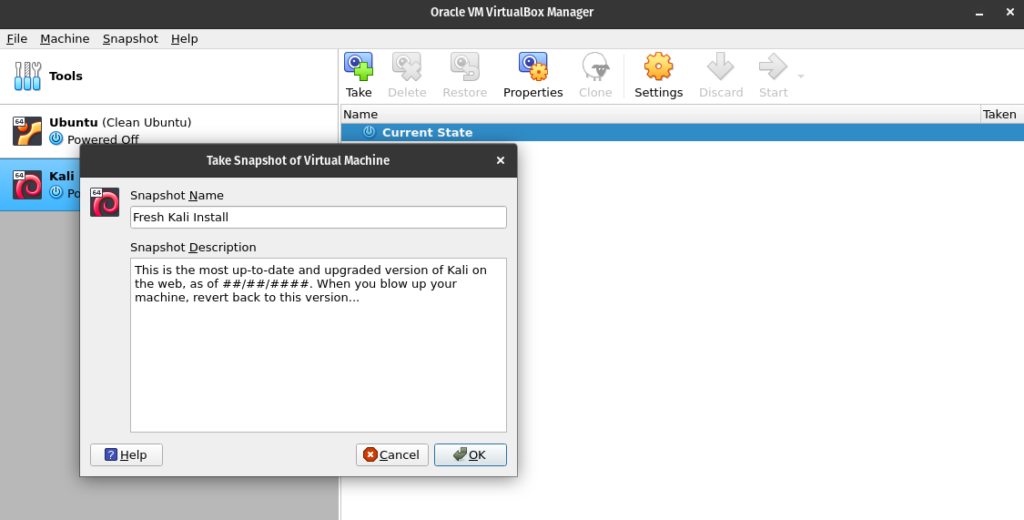
Enter a title and description for the snapshot then click Ok.
Closing Thoughts
In my experience, Kali has been one of the more complex installations, which is why I chose it for this tutorial. With this said, I built this post as the tutorial that I would have personally liked to have found when I was just starting out, as not having the resources or knowledge to build virtual machines in those days has likely stunted my development.
There were many things that I would have liked to try, but the risk to the overall system seemed too great. With this fear gone, I hope that you’ll go forth with the confidence to experiment with many other distributions, scripts and software.
